High quality Valve Cover Gasket offering durable sealing performance reducing leaks and ensuring reliable engine protection for long
Is that the distinct smell of burning oil wafting from your engine bay?
You might be dealing with a failing Valve Cover Gasket.
It starts as a minor leak.
It ends as a major engine repair bill.
But diagnosing and fixing this issue doesn’t have to be a nightmare. I’ve put together a no-nonsense guide to help you identify the signs, choose the right replacement, and seal your engine up tight.
Let’s get to work.
What is a Valve Cover Gasket and What Does It Do?
A valve cover gasket is a critical engine component designed to seal the gap between the valve cover and the cylinder head. Acting as a barrier, its primary function is to keep motor oil inside the engine while preventing dirt, dust, and debris from entering the delicate valve train. Much like the industrial sealing solutions we engineer at COVNA, this gasket ensures that the internal pressure is maintained and that fluids remain contained within the system. Without a functional gasket, the engine is susceptible to fluid loss and contamination, which can compromise overall performance and longevity.
The Role of the Gasket in Your Engine
The gasket serves as the primary engine seal for the top section of the motor. It endures significant thermal cycling and vibration to maintain a tight seal around the camshafts, rockers, and valves.
- Oil Containment: Prevents oil from escaping onto the hot exhaust manifold or engine block.
- Contaminant Protection: Stops external debris from fouling the internal lubrication system.
- Pressure Management: Helps maintain the necessary internal environment for efficient engine operation.
Common Materials Used in Gasket Construction
High-quality manufacturing standards, similar to those used in our ISO9001-certified industrial valves, dictate the materials used for these gaskets. Durability against heat and chemical corrosion is paramount.
- Rubber (NBR/Nitrile): Common for standard applications, offering good oil resistance.
- Silicone: Used for its flexibility and high-temperature tolerance.
- Cork: An older material, often combined with rubber, though less common in modern high-performance engines.
- Viton (FKM): A premium fluoropolymer elastomer we often utilize for industrial sealing due to its superior resistance to extreme heat and aggressive chemicals.
- EPDM: Excellent for resistance to weathering and varying temperatures.
How the Gasket Prevents Oil Leaks
The gasket prevents an oil leak by filling the microscopic imperfections between the mating surfaces of the valve cover and the cylinder head. When the cover bolts are tightened to the correct specification, the gasket material is compressed, creating a gasket seal that accommodates thermal expansion and contraction.
Key factors in leak prevention:
- Compression: Proper torque ensures the material fills all gaps on the sealing surface.
- Elasticity: The material must remain flexible to maintain contact during engine vibration.
- Chemical Resistance: The gasket must resist degrading when exposed to hot motor oil over time.
Common Symptoms of a Bad Valve Cover Gasket
Identifying a failing seal early can save you from costly repairs down the line. As manufacturers of precision sealing components, we know that a compromised barrier leads to immediate performance drops. Here are the clear indicators that your gasket has lost its integrity.
Visible Oil Leaks and Low Oil Levels
The most obvious sign of failure is an oil leak originating from the top of the engine. You might notice a coating of dirt and sludge building up around the cylinder head and the valve cover seam. This gasket seal oil seepage creates a wet, greasy appearance on the engine body. Over time, this constant loss leads to noticeably low oil levels on your dipstick. If you find yourself frequently topping up oil without seeing puddles on the ground, the oil is likely leaking slowly and baking onto the hot engine block.
Burning Oil Smell from the Engine Bay
A distinct, acrid odor of burning oil often accompanies a cracked gasket. This happens when leaking fluid drips onto the extremely hot exhaust manifold or other high-temperature engine components. As the oil burns off, it generates smoke and a strong smell that can be pulled into the cabin through the HVAC intake. This is not just unpleasant; it indicates that flammable fluid is escaping onto hot surfaces, posing a potential fire risk in the engine bay.
Engine Misfires and Spark Plug Fouling
In many overhead cam engines, the valve cover gasket also seals the spark plug tubes. When these internal seals fail, oil leaks directly into the spark plug wells. This rocker cover internal leak submerges the ignition coils and plugs in fluid, causing spark plug fouling. The result is a rough idle, engine hesitation, or a “Check Engine” light due to cylinder misfires. If you pull a spark plug and it is covered in oil, the valve train sealing system has definitely failed.
Why Do Valve Cover Gaskets Fail?
Even though the valve cover gasket is a simple component, it operates in a harsh environment. It sits right on top of the cylinder head, acting as a barrier between the oily internals of the valve train and the outside world. While they are designed to be durable, they aren’t invincible. Understanding why they fail helps you catch problems before they turn into a massive oil leak or engine damage.
Heat and Age-Related Degradation
The most common enemy of any engine seal is time combined with heat. Your engine goes through thousands of heat cycles—heating up to operating temperature and cooling down completely.
- Hardening: Over time, the rubber or cork material loses its flexibility and becomes brittle.
- Cracking: Once the material hardens, it can no longer expand and contract with the metal. This leads to a cracked gasket dry out engine scenario where oil begins to seep through the fissures.
- Shrinkage: Aged gaskets often shrink, breaking the tight seal required to keep oil inside.
Eventually, this natural wear and tear leads to gasket failure engine issues that require immediate attention.
Engine Overheating and Pressure Buildup
Excessive heat does more than just age the rubber; it can physically warp the metal components. If your engine overheats, the valve cover (especially if it is plastic) or the cylinder head can distort. When the mating surfaces are no longer flat, even a new gasket cannot prevent oil seepage.
Internal pressure is another major factor. A clogged PCV (Positive Crankcase Ventilation) valve can cause pressure to build up inside the crankcase. This pressure has to go somewhere, and it often blows out the weakest link—the valve cover gasket. In the world of combustion engine automotive repair, checking the PCV system is a critical step to ensure the new gasket doesn’t fail for the same reason.
Improper Installation and Bolt Torque
Believe it or not, human error is a frequent cause of leaks. Installing a gasket seems straightforward, but it requires precision.
- Overtightening: Cranking down the bolts too hard can crush the gasket, causing it to split or bulge out of the sides.
- Undertightening: Loose bolts prevent the gasket from forming a proper seal against the sealing surface.
- Dirty Surfaces: If the old gasket material wasn’t fully scraped off, the new one won’t sit flush.
Professional mechanic advice always emphasizes using a torque wrench to tighten bolts to the manufacturer’s specifications. This ensures the load is distributed evenly across the engine body, preventing future leaks.
Valve Cover Gasket Replacement Cost
When facing a leak repair, understanding the financial impact is crucial for proper budgeting. While we specialize in industrial automation at COVNA, we understand that quality sealing is the backbone of any system, whether it is a massive pipeline or a compact combustion engine. The cost to replace a valve cover gasket is generally affordable compared to major engine overhauls, but ignoring it can lead to expensive damage later. Investing in high-quality materials ensures a tight seal and prevents recurring issues.
Average Parts and Labor Expenses
The total replacement cost is usually split between the price of the engine component itself and the labor required to install it. The gasket is often the cheapest part of the equation.
- Parts Cost: A standard rubber or cork gasket typically costs between $10 and $40. However, high-performance gaskets made from advanced materials like Viton or silicone—similar to the industrial-grade NBR and EPDM we use in our valves—can range from $50 to $100.
- Labor Cost: This is where the price jumps. Professional mechanic advice suggests that labor can range from $100 to $300 or more, depending on the shop’s hourly rate.
If you are handling vehicle maintenance yourself, you only pay for the parts. However, for complex engines where the cylinder head is difficult to access, paying a professional ensures the job is done right without damaging the sealing surface.
Factors That Influence Total Repair Costs
Not all engines are built the same, and several variables can drive up the price of a valve cover gasket job.
- Engine Configuration: A simple 4-cylinder engine has one valve cover and is easy to access. A V6 or V8 engine has two covers, requiring two gaskets and double the labor.
- Accessibility: In many modern vehicles, the intake manifold or other components must be removed to reach the valve cover. This adds significant labor time.
- Additional Parts: Often, a leak repair involves more than just the main gasket. You may need to replace spark plug tube seals, grommets, or apply high-temperature RTV silicone to ensure a leak-free result.
- Material Quality: Opting for OEM (Original Equipment Manufacturer) parts ensures better durability compared to cheap aftermarket alternatives that might fail under heat.
How Long Does the Replacement Process Take?
Time is money, especially when paying for labor. The duration of the repair depends heavily on the vehicle’s design and the mechanic’s experience.
- Simple Engines: For most 4-cylinder engines, the replacement is straightforward and typically takes about 1 hour.
- Complex Engines: On V-configuration engines or compact engine bays where space is tight, the process can take 3 to 5 hours.
- Curing Time: If RTV sealant is used at the corners or “half-moons” of the gasket, the vehicle may need to sit for a few hours to allow the sealant to cure properly before the engine is started.
Proper installation is critical. Rushing the process can lead to a pinched gasket or improper torque, causing the oil leak to return immediately.
How to Replace a Valve Cover Gasket: A Step-by-Step Guide
Replacing a valve cover gasket is a manageable task that restores the integrity of your engine component systems. As a manufacturer experienced in industrial sealing solutions, we know that precision is key to preventing future leaks. Whether you are dealing with a standard rubber seal or a high-performance Viton gasket, the process requires attention to detail to ensure a tight seal and protect the valve train.
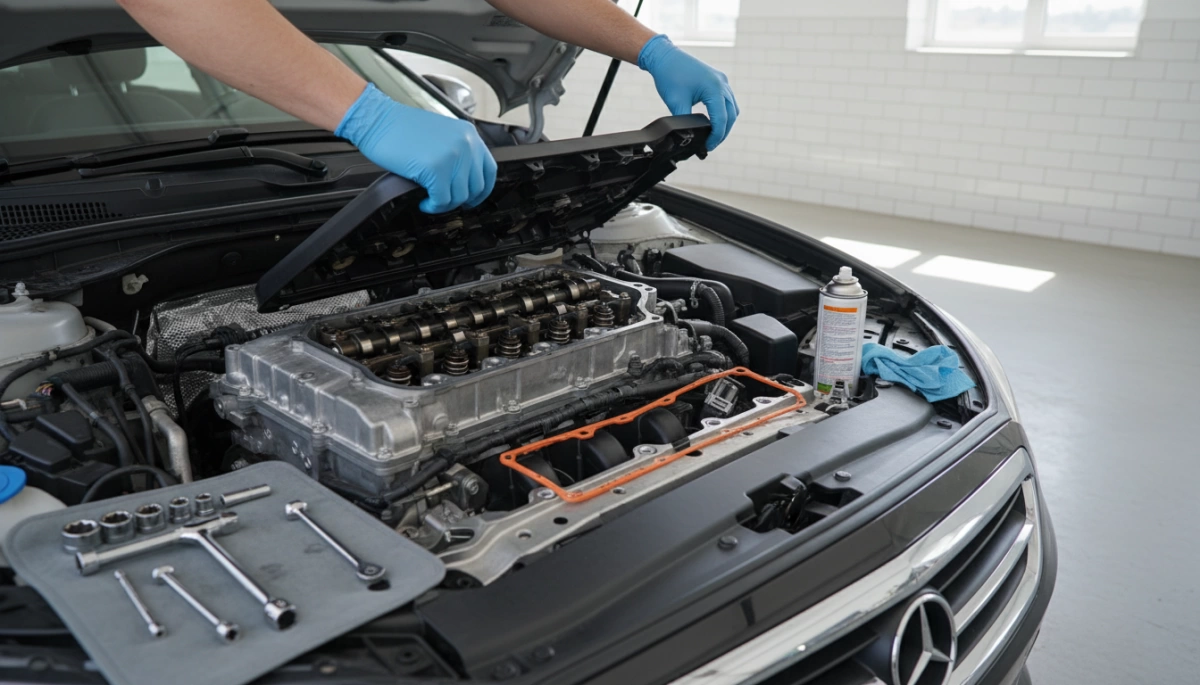
Preparation and Removing the Valve Cover
Before starting, ensure the engine is cool to avoid burns and prevent warping the cylinder head or cover. Safety is our priority in any maintenance task.
- Disconnect the Battery: Always disconnect the negative battery terminal to prevent electrical shorts.
- Clear the Area: Remove any spark plug wires, ignition coils, PCV hoses, or brackets obstructing the valve cover. Labeling these parts helps during reassembly.
- Remove Bolts: Loosen the valve cover bolts. It is best to work from the outside in or follow the specific pattern for your vehicle to release tension evenly.
- Lift the Cover: Gently tap the cover with a rubber mallet if it is stuck. Do not pry with a metal screwdriver, as this can damage the sealing surface and cause permanent damage to the engine body.
Cleaning the Sealing Surfaces Properly
The most critical step in achieving a leak-free result is surface preparation. Even the best gasket will fail if the mating surfaces are dirty. Just like a high-performance motorized valve for precise flow control relies on immaculate seating to function, your engine requires a spotless surface to hold pressure.
- Remove Old Material: Use a plastic scraper or a gasket removal tool to strip away the old gasket seal. Avoid metal scrapers on aluminum heads to prevent gouging.
- Clean Thoroughly: Wipe the surface with brake cleaner or a degreaser to remove all traces of oil and residue. The metal should be dry and clean.
- Inspect for Damage: Check the valve cover for cracks or warping. A cracked gasket dry out engine scenario often stems from reusing a damaged cover rather than the gasket itself.
Installing the New Gasket and Reassembly
Once the surfaces are prepped, installing the new engine seal is straightforward. We recommend using high-quality materials like NBR or EPDM, which we utilize in our industrial automation solutions for their durability.
- Position the Gasket: Fit the new valve cover gasket into the groove of the valve cover. Ensure it sits flat and is not twisted.
- Apply Sealant (If Required): Some engines require a small dab of RTV silicone at sharp corners or where the cylinder head meets the intake manifold. Do not over-apply, as excess silicone can break off and clog internal oil channels.
- Reinstall the Cover: Carefully lower the cover onto the engine, ensuring the gasket stays in place.
- Torque to Spec: Tighten the bolts by hand first, then use a torque wrench to tighten them to the manufacturer’s specifications. Over-tightening is a common cause of gasket failure engine issues, as it crushes the rubber and breaks the seal.
- Final Check: Reconnect all hoses, wires, and the battery. Start the engine and check for any oil seepage around the perimeter.
Frequently Asked Questions
Can You Drive with a Leaking Valve Cover Gasket?
Technically, you can drive your vehicle for a short period, but we strongly advise against ignoring it. While a minor oil leak might seem like a nuisance, it can quickly escalate into a safety hazard. Oil dripping onto a hot exhaust manifold creates smoke and a significant fire risk. Furthermore, continuous gasket seal oil seepage leads to low oil levels, depriving the engine of lubrication and potentially causing catastrophic failure.
- Fire Risk: Leaking oil on hot exhaust parts can ignite.
- Engine Damage: Low oil causes friction and overheating.
- Belts and Hoses: Oil contamination degrades rubber components rapidly.
If you notice a burning smell or see smoke, seek mechanic advice immediately. Maintaining a tight seal is critical for safety and vehicle maintenance.
How Long Does a Valve Cover Gasket Typically Last?
The lifespan of a valve cover gasket depends heavily on the material used and the operating conditions of the engine. In our experience with industrial sealing—similar to the precision required in a pilot operated diaphragm solenoid valve—heat cycles are the primary enemy of rubber and polymer seals.
| Material Type | Estimated Lifespan | Common Failure Cause |
|---|---|---|
| Cork/Composite | 20,000 – 50,000 miles | Dries out and cracks easily. |
| Rubber (NBR) | 40,000 – 80,000 miles | Hardens due to heat cycles. |
| Silicone/Viton | 80,000 – 100,000+ miles | Generally lasts the longest; resists high heat. |
Eventually, every cracked gasket dry out engine scenario is inevitable due to age. Regular checks during oil changes can prevent a sudden gasket failure engine issue.
Valve Cover Gasket vs. Oil Pan Gasket: What’s the Difference?
While both components are essential for engine body sealing, they serve different locations and handle different pressures.
- Valve Cover Gasket: Located at the top of the engine. It seals the cylinder head and protects the valve train (rocker arms, valves, springs) from leaking oil externally. It prevents oil from fouling the spark plugs and ensures the rocker cover internal pressure remains stable.
- Oil Pan Gasket: Located at the very bottom of the engine. It seals the oil pan (sump) where the oil collects when the engine is off.
The replacement cost and labor for an oil pan gasket are often higher because the subframe or suspension parts may need to be removed to access the bottom of the engine. In contrast, an oil valve cover replacement is generally more accessible. Both are critical for preventing leaks and ensuring proper cylinder protection.